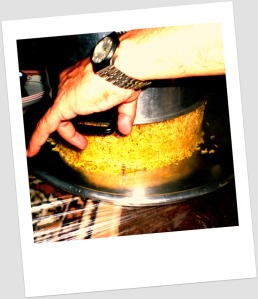
Ma’karonah Bil Bechamel: Baked Middle Eastern Pasta with Bechamel Sauce
Ma’karonah Bil Bechamel is a very popular and easy to prepare, baked pasta dish. Egyptians are known for their Ma’karonah Bil Bechamel, but Palestinians make it too. Bechamel is simply a white sauce that is thickened with flour.
There are so many different ways people make Ma’karonah Bil Bechamel. I’m posting what I find to be the easiest recipe, and will provide two variations on making the actual white sauce.
For a slightly healthier and lighter version of this dish, try Koosa Bil Bechamel, where zucchini is used as a substitute for pasta. It’s equally delicious, and you won’t feel as bad eating it :)
Ingredients
approx 2 lbs of ground beef or lamb (for ~8 people)
1 large onion, finely chopped
2 tablespoons of vegetable oil
1 tsp each of allspice (or “bharat” spice), black pepper
1/2 tsp each of cardamom, cinnamon, turmeric
salt to taste
large package of elbow macaroni (or penne, or any other medium-sized short-cut pasta)
For the Bechamel sauce:
5 cups of cold milk
4 tablespoons of flour
1 egg, whisked
3 tablespoons of butter
Method
Start by boiling your pasta until it’s just cooked. Drain.
In a pan, saute the chopped onion until soft, then add the ground meat. Cook the meat thoroughly, breaking it up so you don’t end up with any large clumps. Season with the allspice/bharat, pepper, cinnamon, cardamom, turmeric, and salt to taste.
Coat the bottom of a large baking dish with a few drops of oil. Using half of the cooked pasta, make an even layer of pasta in the bottom of the baking dish. On top of that, add all of your cooked meat, spreading it out to make an even layer.
On top of the meat, add another layer of pasta using the remaining half.
Set this aside while you make the Bechamel sauce:
Method 1 (easier, less likely to clump):
Pour one cup of the cold milk into a saucepan. Add the flour and egg, and whisk until smooth. Add the rest of the milk, the butter, and salt&pepper to taste, and bring to a boil, stirring constantly. After it boils, keep cooking for approx. five more minutes, then remove from the heat.
Method 2 (more difficult and likely to clump, but richer tasting):
In a saucepan, melt the butter. Add the flour and stir constantly, letting it cook for about a minute and turn golden brown (basically making a roux). Add the cold milk and whisked egg to the pan slowly, stirring constantly. Bring to a boil, stirring constantly. When it boils, cook for a couple of minutes, then remove from heat.
—
Pour the Bechamel all over the top of the pasta.
Spread it to even it out, making sure to cover the pasta entirely. Set it aside for a few minutes to let it cool and set a bit.
Finally, bake in a hot oven (~450 dgrees) until the top of the Ma’karonah Bil Bechamel browns. This usually takes about an hour. You can put it under the broiler for a couple minutes at the end to make sure the top is perfectly golden, with some darker patches here and there (the best part!).
Alternatively, when I’m in a hurry, I don’t even bother baking it since all the components are already cooked. I simply broil the top, which takes about ten minutes; this method is good for when you’re in a rush, but the layer of Bechamel will have a slightly runnier consistency. If you chose Method 1 for the Bechamel sauce, I highly recommend you bake the dish thoroughly.
Khobbeizeh: Middle Eastern Greens
Khobbeizeh, or Malva Parviflora, is a wild green that grows throughout the Middle East and North Africa. In Palestinian culture, Khobbeizeh is a food for the common – a green that you can make a cheap, filling, and very healthy meal out of. The season for Khobbeizeh is late fall to early winter, and around this time of the year in Jordan, the markets are full of it. People even go out to large fields outside the city to harvest huge bundles of the wild Khobbeizeh. I’m not sure if you can get it in the US, so I don’t really know how useful this recipe is to people who don’t live in an area where Khobbeizeh grows, buuut because it is such a traditional dish, I definitely wanted to include it in my collection :)
Like spinach or most other greens, Khobbeizeh cooks down to very little, so you need to purchase/obtain it raw in large quantities. There are many, many ways to cook it, and the recipe that I am going to post is a combination of several different variations. Traditionally, the Khobbeizeh leaves are dropped into boiling water, then a traditional whisk-like tool called a Mifrak is used to whisk the leaves rapidly until they start to fall apart. My recipe uses a less traditional and slightly easier method. Although my family doesn’t really make Khobbeizeh that often, it is a very traditional Palestinian dish, and I highly recommend trying it if you like greens in general (or believe in eating them once in a while to feel better about your otherwise-unhealthy diet).
Ingredients
4-5 cups of Khobbeizeh leaves, washed, de-stemmed, and very finely chopped
2 medium onions, chopped
2-3 cups of water or stock
1 cup of fresh parsley, finely chopped
1 cup of coriander, finely chopped
5 cloves of garlic, crushed
5-6 tbsp of vegetable or olive oil
1 cup of coarse bulgur OR roasted green wheat (freekeh) OR regular or wholewheat flour
salt& pepper to taste
Method
In a large pot, heat 2-3 tbsp of oil, then add half of the chopped onion. Sautee the onion until tender, then add the chopped Khobbeizeh leaves. Sautee until they wilt and cook down.
Add the water or stock, and stir, letting it come to a boil. Don’t use too much liquid; you want to add just enough to get a very thick, stew-like texture. Add the chopped parsley and coriander.
If using bulgur OR smoked wheat: wash the grains then drain. Soak in hot water for ten minutes, then drain, and add them to the pot of Khobbeizeh.
If using flour: put the flour in a small bowl and gradually sprinkle a couple tablespoons of cold water all over it. Mix it gently with a fork until the flour forms little balls of dough. Sprinkle on more water if needed. Then, add the dough balls to the pot of Khobbeizeh.
Leave the Khobbeizeh to simmer on low heat for a few minutes while you prepare the ‘ad7ah. Remember, ‘ad7ah is basically adding sauteed garlic to whatever you’re cooking to give it an extra layer of flavor. So, in a small frying pan or saucepan, heat the rest of your oil, then add the rest of the chopped onion and the crushed garlic. Fry until golden brown, then pour the whole thing into the pot of Khobbeizeh. Watch out; it can really splatter!
Give the pot of Khobbeizeh a stir, add salt&pepper to taste, and serve with fresh bread, sliced lemons, and green onions on the side. Enjoy!
Homemade Snacks: Baleela and Fule
In the fall and winter, the streets of Amman are filled with men selling Baleela and Fule off of small carts. Baleela – not to be confused with the Egyptian wheat cereal – is chickpeas cooked in a tomato broth, while Fule is fava beans cooked until tender with lemon and salt. Both are flavored with cumin, and are eaten as a popular street food.
I particularly remember leaving the University of Jordan campus on gray, rainy winter evenings, and stopping to order Fule from the man with his cart who stood right outside the main gate. For 25 piasters, I would get a good-sized plastic pouch of Fule from the steaming hot mound piled high, and decorated with slices of fresh lemon. I would snack on the hot beans as I waited to get a taxi home.
Many people make Baleela and Fule as an evening snack at home, too, because it’s so easy,and you can control the quality and quantities of seasoning.
Baleela
2 cups of good quality chickpeas (dried or canned)
2-3 large onions, sliced into rings
1 cup of tomato sauce OR 3 tbsp of tomato paste
1 tbsp of cumin
1/2 tbsp of ginger
1/2 tbsp of black pepper
1/4 tsp of turmeric
1/4 tsp of paprika (optional)
hot pepper flakes or hot chili powder to taste (optional)
salt to taste
Method
If using dried chickpeas, soak them in water overnight, or give them a Quick Soak: Put the chickpeas in a pot and cover with about two inches of water. Let boil for 5 minutes, then turn off the heat, cover, and let the peas soak for an hour to an hour and a half. They should be slightly tender by now. Add half a cup of water and simmer, covered, on medium heat for about 20 minutes or until chickpeas are cooked and tender. Proceed with recipe.
If using canned chickpeas, drain the liquid off of them, rinse, then put in a pot and cover with about two inches of water. Cover and let simmer on medium heat for about 20 minutes. Proceed with recipe.
To the pot of chickpeas and water, add the rest of the ingredients. Simmer, covered, on low heat for 20 minutes.
Serve in bowls, with plenty of the broth! Squeeze fresh lemon on it right before eating.
Fule
2 cups of good quality dried fava beans (they’re usually quite large, but the variety I found here at my Middle Eastern store were really tiny, as you can see in the picture)
2 onions, chopped
1.5 tbsp of cumin
1/2 tbsp of black pepper
hot pepper flakes or hot chili powder to taste (optional)
salt to taste
Method
Soak the beans overnight or using the Quick Soak Method described above for the chickpeas.
To the pot of fava beans and water, add the rest of the ingredients. Let simmer, covered, on low heat for 20-30 minutes. The skins of the beans should start to crack open; this is a sign that they’re ready.
Fule is usually served steaming hot and without the broth. People sprinkle salt, extra cumin, and a squeeze of lemon onto their individual servings. You eat them with your fingers, popping the skins off before putting them in your mouth. Delicious!
Pasta with a Palestinian Twist…plus a bonus recipe at the end!
I love pasta, and was really excited when I first had pasta the way a lot of Palestinians make it: with yogurt and nuts! It might seem strange to a lot of people for a pasta sauce to be made using just plain yogurt, but it makes for a really light dish. We especially like it in the summer because it is served cold. It’s also super easy, and my brother and I had fun whipping it up quickly.
Note: everyone I have seen uses spaghetti for this dish, but we didn’t have any, so I just used penne pasta. It worked just fine :)
Ingredients
1 package of pasta (any kind you like)
half a kilo of ground meat
vegetable oil to brown the meat
1 tablespoon each of pepper, cinnamon, allspice + salt to taste
1 large onion, finely chopped
4-5 cloves of garlic, finely crushed
1 large container of yogurt (more if you like the pasta more yogurt-y!)
half a bunch of parsley, finely chopped
3/4 cup of almonds (halved and skinned or slivered) and 1/4 cup of whole pine nuts
oil for browning the nuts
salt to taste
Method
Boil the pasta in well-salted water. When it’s cooked, drain off the water.
In a big bowl, mix all of the yogurt and garlic. Add salt to taste. Stir in the cooked pasta. Combine till the pasta is well coated. If you like more yogurt or garlic, add more!
Lay the pasta with yogurt in a casserole/baking dish. It needs to be somewhat deep, so you can layer the ground meat, nuts, and parsley on top. Chill the dish of yogurt+pasta in the refrigerator.
When you’re ready to eat, heat some oil in a pan, then add the chopped onion, cooking until it becomes very soft and just barely starts to turn golden. Add the ground meat, and break it up with your spatula as it cooks. Cook it thoroughly, adding the pepper, cinnamon, allspice, and salt to taste. After it cooks, turn up the heat just a bit and let it brown till it gets a bit crispy, if you like. Spread the layer of cooked meat on top of the chilled pasta+yogurt. In the picture below, I had already started layering on the nuts..
In another frying pan, heat some oil and brown the pine nuts, then the almonds. You want them to be a nice golden color. Stir them constantly as they brown, because they burn easily. If you don’t have pine nuts, just use more almonds. That’s what we did! Layer the browned nuts on top of the layer of meat.
Finally, spread the chopped parsley in a layer on top of the nuts. This is the final step, and makes the dish look so pretty!
 Serve! This recipe can be adjusted according to your preferences; if you like more yogurt, less garlic, more meat, less nuts…whatever!
Bonus Recipe: Another way some Palestinians make pasta is by mixing crushed, dried mint, crushed garlic, and salt to taste in a small bowl. Then mix about a quarter cup of buttermilk into a large container of plain yogurt till you get a thick, saucy consistency (use less buttermilk if you like it thicker). Add the mint+garlic mixture to the yogurt sauce. Heat this sauce in a saucepan if you’d like to serve it hot; otherwise, it’s great cold too. They serve the sauce by spooning it over spaghetti, then sprinkling each serving with browned pine nuts. It’s fantastic and great if you don’t like meat!
Some Simple Salads…
I thought I would post a few simple salad recipes today. They are refreshing, and a great complement to any meal.
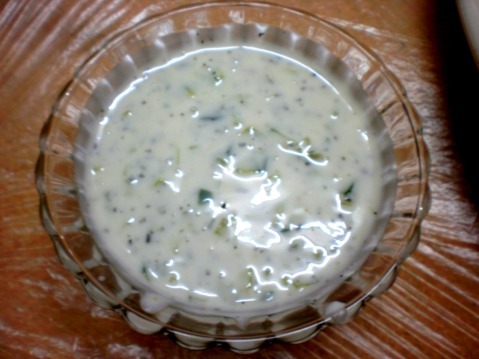
Palestinian Cucumber-Mint Yogurt Salad
Ingredients
2 cucumbers, chopped finely or grated
1 tub of plain yogurt
3-4 cloves of garlic, mashed
1-2 heaping tablespoons of dried mint
salt to taste
Method
Mix all the ingredients together in a bowl except for the mint. Then, put the mint between your palms and rub your hands together briskly over the bowl, letting the mint fall in. This releases the oils in it and makes sure it gets ground up finely.
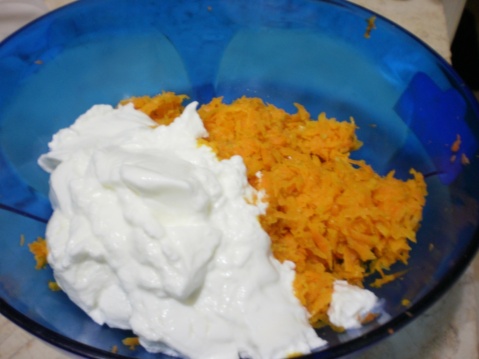
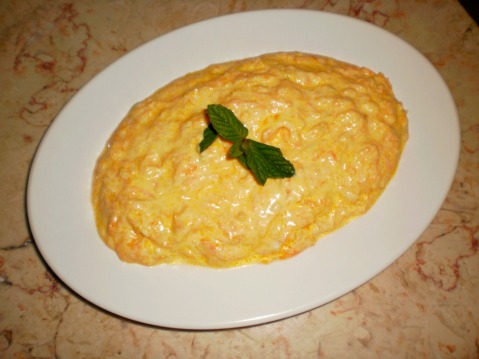
Turkish Carrot Yogurt Salad
Ingredients
5 large carrots, grated
4-5 cloves of garlic, crushed (you can also use garlic salt instead, but I prefer fresh garlic)
3-4 tablespoons of vegetable oil for sauteeing
aprox 2 tubs of plain yogurt
salt to taste
Method
In a frying pan, heat the oil. Add the crushed garlic and sautee it until just golden.
Then, add the carrots to the frying pan and sautee them until they get tender and turn a dark orange color. Take them off the fire and let them cool off.
In a mixing bowl, empty the tubs of yogurt. Add the carrots, scooping all the oil out of the pan into the yogurt. Add salt to taste.
Serve chilled.
Fasulya b Zeit, or Turkish Green Bean Salad
Ingredients
aprox 1 kilo of fresh green beans, washed, with the ends taken off, and cut in half
1 large tomato, chopped
1 large onion, chopped
aprox 1/3 cup of olive oil, more if you want
salt to taste
pinch of sugar
Method
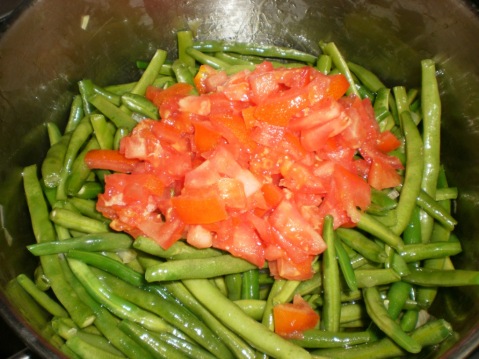
In a cooking pot or wok, heat the olive oil. Add the chopped onion and sautee until tender. Then add the green beans.
Sautee the green beans gently for a couple minutes, then add the chopped tomato.
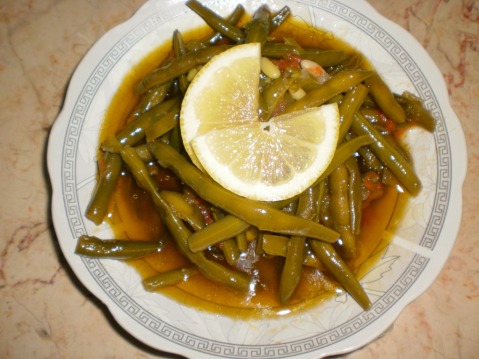
Stir, then add water to the pot, until just a few centimeters below the level of the beans. Add salt to taste and a sprinkle of sugar. Cover the pot and let the beans cook on a low flame. Keep covered. Check every fifteen minutes if they need more water. The dish is ready when the beans are tender. Serve chilled (although my Arab relatives preferred to eat this dish hot, with a squeeze of lemon juice, using bread to scoop up the beans!).


